
Since the motor has been installed it is now time for the endless details necessary to insure safe and respectable quarter mile jaunts down the track. We like to call these details the “laundry list” because they’re seemingly never ending.
- Setting the steering shaft length- The Flaming River adjustable shaft was not long enough in its as purchased form. The engine in its set back form did not provide adequate clearance with the upper joint and our MAC 1 ¾ long tube headers. We have also noticed that on other occasions the shaft length with aftermarket K-members was also too short. A call to Flaming River was in order. As it turns out a longer piece of stock was available and it costs only $10 ($17 w/shipping). This remedied the problem and we are now ready to move on again. Note: additional clearance can also be obtained by loosening the four nuts that hold the steering column to the pedal assembly with a helper prying on the shaft in the engine compartment to gain a bit more distance between the shaft and the header.
- Next we installed the manual brake adapter plate, which simply fits in place of the factory power brake booster. These adapter plates are available in the aftermarket from Auto Specialties and other suppliers. Our plate was an original Ford piece sourced from an early 80s Fairmont with manual brakes. The master cylinder we use is a part which goes all the way back to our original Mike’s Mustangs project car “88LX”. The master is a 1988 Ford Ranger unit, which I previously had seen installed on a Roush car about ten years ago. The lines on this master now exit facing the fenderwell instead of towards the engine bay, which makes for a much cleaner appearance of the lines.
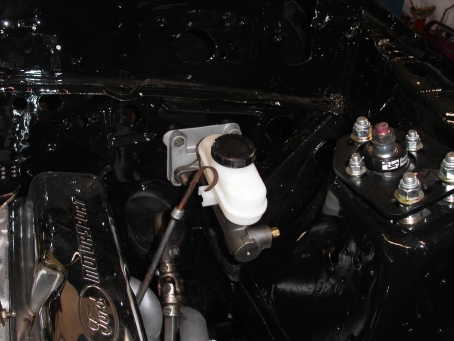
FORD RANGER MANUAL BRAKE MASTER CYLINDER
The female flare lines out of the master are now standard American flare lines, no more metric bubble flares. At this time we now eliminate the factory proportioning valve and replace it with a Summit adjustable proportioning valve (sourced by Wilwood) teed into the rear brake line. The front lines will be teed from the Hurst roll control unit (line-lock). Simply put – the front fitting off the master, which controls rear brake action, now feeds directly to the adjustable valve and to the factory tee on the rear axle housing. The rear fitting on the master, which conversely feeds the front brakes, goes directly to the input side of our line loc where it then comes out the two output ports to each of our front calipers. This makes for a nice touch in lite’s engine compartment.
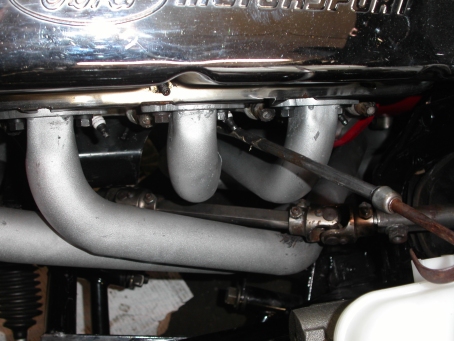
FLAMING RIVER STEERING SHAFT ASSEMBLY
- Next we will be starting on our fuel system. We will be using a Summit 8 gallon fuel cell for this car. Since this is a trunk car we will have to fabricate a divider to separate the trunk area from the passenger compartment. This is necessary as a NHRA rule prohibits the fuel and/or battery from being within this area. NHRA also mandates a shield be placed around the exposed portion of the fuel cell which protrudes through the sheet metal of the trunk floor. By the way, did we mention that you should never embark on a building a drag car without the aid of an up to date NHRA rulebook!
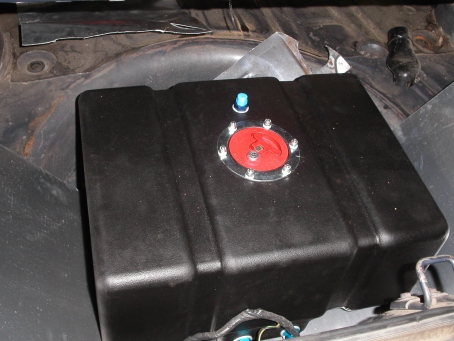
SUMMIT 8 GALLON FUEL CELL
Coming soon – We will continue with more details of lite’s fuel system from pump to lines to carb and much more. Stay Tuned!
Be the first to comment